Do you want to learn how to clean around your iPhone camera to take clear, high-quality photos? Dust and grime can impair your camera’s performance, but with the right approach, you can eliminate this problem effortlessly.
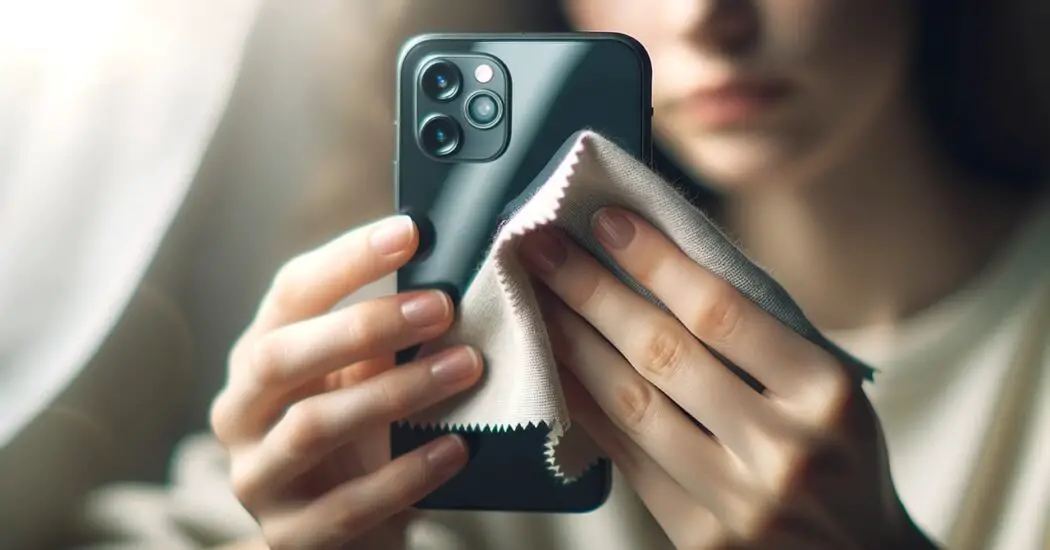
Table of Contents
Why Cleaning the iPhone Camera Matters
You may not notice it immediately, but over time, dust and debris can accumulate around your iPhone’s camera. This affects the clarity and quality of your photographs. Keeping the lens clean ensures that you capture moments as vividly as they happen.
What You Will Need: How to Clean Around Your iPhone Camera
Before you begin the cleaning process, gather the following items:
- Microfiber cloth
- Lens cleaning solution or isopropyl alcohol
- Cotton swabs
- Soft-bristled brush or lens pen
How to Clean Around You iPhone Camera Step by Step
Follow the steps below to clean around your iPhone camera…
Initial Inspection
The first step you should take is to give your iPhone’s camera lens and the surrounding casing a thorough inspection. The aim here is to identify any visible particles, dust, or grime that might have settled on or around the lens.
Turn Off Your iPhone: It’s a good safety measure to turn off your phone to ensure you don’t accidentally tap on something you shouldn’t while focusing on the cleaning.
Find a Bright Light Source: Proper lighting is crucial for this step. Whether it’s a desk lamp or natural sunlight, make sure you have enough light to clearly see the camera lens and the area around it.
Hold Your Phone Up to the Light: Grip your turned-off iPhone in such a way that the camera lens is exposed to the light. Rotate it gently to inspect from various angles, paying close attention to corners and edges where dust might hide.
Identify Problem Areas: As you inspect, take note of any particles, smudges, or dust that could affect photo quality. These are the areas you’ll target in the cleaning process.
Wipe with Microfiber Cloth
After your initial inspection, you’re ready to begin the cleaning process. A microfiber cloth is an excellent tool for this purpose because of its soft texture and ability to pick up particles effectively.
Prepare the Microfiber Cloth: Unfold the cloth and hold it so that you can easily use it to wipe the lens. Make sure the cloth is clean to avoid introducing more particles onto the lens.
Position the Cloth Over the Lens: Gently place the microfiber cloth on the lens so that it makes full contact. This ensures that you will be able to pick up any loose particles effectively.
Apply Circular Motions: Begin to gently wipe the surface of the lens in a circular motion. Start from the center and work your way outward to the edges. This method helps to sweep away the dust particles and smudges from the lens effectively.
Be Gentle: It’s important to emphasize that you should not press down hard while wiping. The lens is delicate and susceptible to scratches, so a light touch is crucial.
Check Your Work: After wiping, lift the cloth and inspect the lens to see if the visible particles and smudges have been removed. If not, you may need to repeat the wiping process or proceed to the next steps in your cleaning routine.
Read more iPhone camera topics here – iPhone Camera: How To, Problems & Solutions
Use a Cleaning Solution
Sometimes, a simple wipe-down with a microfiber cloth isn’t enough to fully clean the lens. This is where a specialized lens cleaning solution or isopropyl alcohol comes into play. These liquids are formulated to clean without leaving residue, making them ideal for delicate surfaces like a camera lens.
Select the Right Cleaner: The first decision to make is whether to use a specialized lens cleaning solution or isopropyl alcohol. Both are effective, but ensure that the isopropyl alcohol is at least 70% for optimal cleaning and quick drying.
Prepare Your Microfiber Cloth: Take your cloth and fold it, exposing a fresh corner. You’ll use this corner to apply the liquid cleaning agent.
Dampen the Cloth: Pour a small amount of the cleaning solution or isopropyl alcohol onto the corner of the cloth. It should be damp but not dripping wet, to avoid any liquid seeping into the phone.
Apply in Circular Motions: Gently begin wiping the lens using the dampened corner of the cloth. Continue to use circular motions, starting from the center of the lens and moving towards the edges. This ensures that you don’t push any grime into the corners.
Dry the Lens: After wiping with the solution, use a dry corner of the microfiber cloth to dab away any remaining moisture. This is essential for avoiding streaks or residue.
Clean the Corners
Even with a cleaning solution, the corners around the camera lens can often be missed due to the cloth’s larger surface area. For this reason, a more pointed tool like a cotton swab is recommended for detailed cleaning.
Prepare the Cotton Swab: Take a cotton swab and dip it into your chosen cleaning solution or isopropyl alcohol. Squeeze out any excess liquid against the edge of the container to ensure it’s damp but not dripping.
Approach with Precision: Gently bring the cotton swab towards the corners of the camera lens, taking care not to touch the lens itself at this stage.
Gentle Scrubbing Motion: Once in position, apply a very gentle scrubbing motion to dislodge any dust or grime that has accumulated in the corners. Again, be cautious not to apply too much pressure to avoid any damage.
Inspect Your Work: After using the cotton swab, take a moment to re-inspect the lens and the corners. The goal is to ensure you haven’t missed any particles or smudges that might interfere with photo quality.
Brush Off Remaining Particles
Sometimes, despite your best efforts with a cloth and cleaning solution, there may be some stubborn particles clinging onto your lens. These particles can be effectively dealt with using a soft-bristled brush or a specialized lens pen.
Choose the Right Tool: A soft-bristled brush designed for lens cleaning is ideal. Alternatively, a lens pen, which has a brush on one end and a cleaning tip on the other, can be equally effective. Make sure the tool you choose is clean and free of any debris to avoid introducing new contaminants.
Position the Brush or Pen: Carefully bring the brush or lens pen towards the lens, ensuring you maintain a steady hand to avoid accidental scratches.
Execute Gentle Strokes: Use gentle, outward strokes to brush away any stubborn particles. The key here is to brush away from the lens toward the edges, to ensure you’re moving the particles out and away, rather than pushing them back into any crevices.
Inspect After Brushing: Once you’ve brushed the area, inspect the lens to ensure the stubborn particles have been removed. If not, a second round of gentle brushing may be necessary.
Final Inspection
You’re almost done! The final step is to ensure that all your hard work has paid off and your lens is as clean as it should be.
Turn On Your iPhone: Safely power your iPhone back on. This will allow you to access the camera and take test shots.
Take Test Shots: Open the camera app and take a few pictures. Try to include different lighting conditions to truly test the lens’s performance. You might want to focus on objects at various distances to ensure clarity throughout.
Review Your Photos: Open your photo gallery and carefully review the pictures you’ve just taken. Look for any signs of blurriness, spots, or other issues that might indicate a still-dirty lens.
Re-Evaluate: If you’re not satisfied with the quality of the test shots, you may need to repeat some of the cleaning steps. If you are pleased with the results, then you have successfully learned how to clean around your iPhone camera lens.
Celebrate Your Success: Take a moment to appreciate your newly cleaned lens and the improved quality of your photos. You’ve successfully navigated the detailed process of lens cleaning, and your reward is crystal-clear photographs.
Conclusion: How to Clean Around Your iPhone Camera
Now that you know exactly how to clean around your iPhone camera lenses, you can ensure that your photos are always top-notch. Keep your lens clean and keep capturing those precious moments.
