If you’ve noticed paint chipping around your iPhone camera, you’re not alone. This is a common issue that many users face, but fortunately, it’s solvable. In this article, we’ll walk you through step-by-step instructions to address this problem.
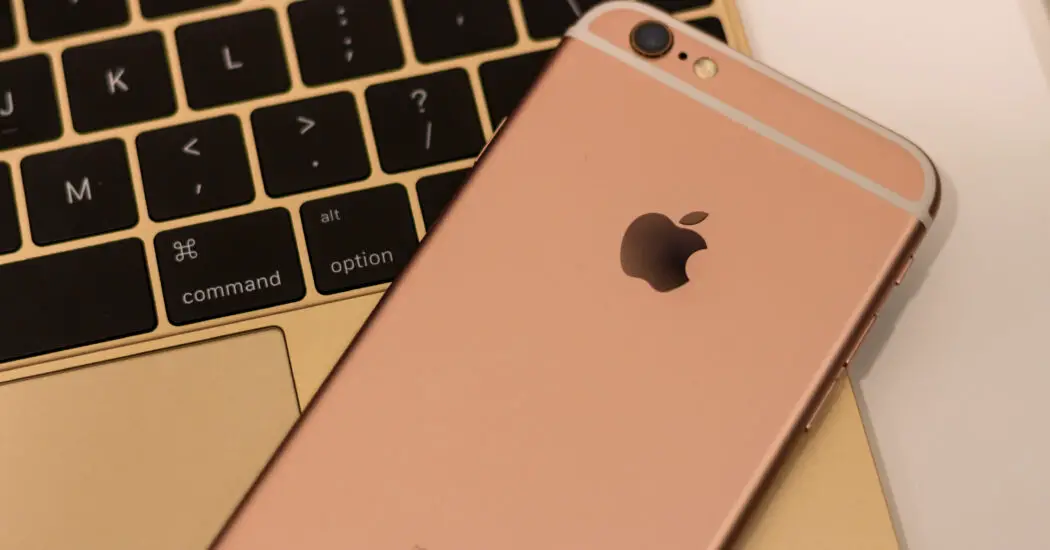
Table of Contents
The Importance of Fixing Paint Chipping Around Your iPhone Camera
When you first notice paint chipping around your iPhone camera, you might dismiss it as a mere cosmetic flaw. However, the situation warrants closer attention. One reason is the camera’s importance to the device’s overall functionality; it’s not just for selfies or capturing memories. Many users also utilize it for professional tasks such as video conferencing.
Moreover, the chipping could indicate the onset of larger structural issues with your iPhone. If the paint is wearing away, it could suggest that other components are also at risk.
Furthermore, paint chipping could expose underlying materials to environmental elements, like moisture, that can creep into the device and cause internal damage. Consequently, what may start as a visual imperfection can evolve into a risk factor for your device’s longevity and performance.
Paint Chipping Around Your iPhone Camera – Identifying the Problem
Before diving into any kind of repair, it’s crucial to understand the scope of the paint chipping issue around your iPhone camera. A superficial examination might not suffice; you need to feel the texture and examine the problem area closely.
To do this, first make sure your iPhone is switched off to avoid any accidental settings changes or other issues. Next, gently rub your finger or a soft cloth around the camera’s perimeter. Feel for any irregularities or areas where the paint has obviously chipped off. It’s also a good idea to use good lighting for this inspection so you can see the minutest details.
If the chipping is severe or covers a broad area, it may require more extensive repair methods or even professional intervention. On the other hand, isolated or minimal chipping can generally be addressed through simple DIY methods that we’ll cover later.
By taking the time to assess the problem, you’ll be well-prepared to tackle it in the most effective manner. Your actions will be informed, targeted, and far more likely to yield a successful outcome.
Materials Needed
Before embarking on your paint touch-up journey, it’s crucial to gather all the necessary materials to ensure a smooth and effective process. Let’s break down what you’ll need:
Fine-Tip Paint Pen: It’s essential that this is the same color as your iPhone. The fine-tip will allow for greater precision when applying paint to the small chipped areas around your camera. You can usually find these specialized paint pens at electronics or auto parts stores.
Microfiber Cloth: This cloth serves a dual purpose. Not only will you use it for cleaning the chipped area prior to painting, but microfiber is also gentle enough that it won’t cause additional scratching or damage.
Painter’s Tape: This tape will help you isolate the area you’ll be working on, ensuring that no paint ends up where it shouldn’t. Make sure the tape is easy to remove so it won’t leave a residue or further damage the area around the camera.
Paint Chipping Around Your iPhone Camera – What to Do
Follow the steps below to touch up the paint around your iPhone camera…
Preparation
Proper preparation is the key to any successful DIY project. For this task, follow these preliminary steps:
Power Off Your iPhone: This is a safety precaution to ensure you won’t accidentally activate any functions on your phone while working around the camera area.
Apply Painter’s Tape: Use the painter’s tape to carefully mask off the area surrounding the camera lens and any other components. Your goal is to expose only the areas where the paint is chipped. This ensures that your paint application will be as precise as possible, mitigating the risk of accidentally painting over areas that are still in good condition.
Cleaning the Affected Area
This step is more significant than it may initially appear. A clean surface will not only make it easier for you to see what you’re doing but also ensure that the paint adheres well.
Gently Wipe with Microfiber Cloth: Use a dry microfiber cloth to softly wipe away any dust, dirt, or debris from the chipped area. Be cautious to not apply too much pressure, which could exacerbate the chipping.
Inspect the Area: After you’ve cleaned it, take a moment to inspect the chipped area. Make sure it’s entirely free of dust and debris. Any lingering particles could get trapped under the new paint, causing it to look uneven or to peel later on.
Read more iPhone camera topics here – iPhone Camera: How To, Problems & Solutions
Applying the Paint
This is the core step where the actual restoration happens. However, the process needs your utmost attention to detail to ensure that the paint goes only where it’s supposed to go.
Shake the Fine-Tip Paint Pen: Before you get started, give your fine-tip paint pen a good shake. This is crucial because it mixes the paint components, ensuring a consistent color. You might hear a small metal ball rattling inside the pen; that’s there to help with the mixing.
Test the Paint: Before applying it to your phone, it’s a good idea to do a quick test on a scrap piece of material to ensure the color matches and the pen is working correctly.
Careful Application: Position the fine-tip of the paint pen over the chipped areas and gently press down. Use a steady hand and minimal pressure to carefully fill in the chipped sections, all the while avoiding any contact with the camera lens. You don’t want to add too much paint; a light touch-up should suffice.
Drying Time
It might be tempting to rush through this stage, especially if everything seems to be going well, but patience is key here.
Wait: Allow the paint to sit and dry for at least 30 minutes to an hour. Do not touch the painted area during this time to prevent smudging.
Check Manufacturer’s Instructions: It’s always a good idea to consult the manufacturer’s guidelines on the paint pen packaging for the exact drying times, as different types of paint may have varying requirements.
Removal of Painter’s Tape
The last thing you want to do is rush this final stage and ruin all your careful work.
Check the Paint: Before you proceed, make sure the paint is completely dry. If it’s not, you risk smearing it when removing the tape.
Slow and Steady: Gently and slowly peel back the painter’s tape, taking care not to lift any of the freshly applied paint with it. If the tape sticks, you can use your fingernail or a soft plastic tool to gently ease it off.
Final Inspection
You’re almost there, but don’t breathe a sigh of relief just yet. The final inspection is your safety net, catching any last-minute errors before you call the project complete.
Visual Inspection: Examine the area you’ve just painted to see if the color matches the surrounding areas. You’re looking for a seamless blend that hides the fact that a repair was ever needed.
Lens Check: Make sure no paint has accidentally gotten onto the camera lens. If you find any, carefully remove it with a microfiber cloth, taking care not to scratch the lens.
Conclusion: Paint Chipping Around Your iPhone Camera
Facing paint chipping around your iPhone camera can be frustrating, but as you’ve seen, the problem is solvable with a little time and the right materials. If you’ve followed these steps carefully, your iPhone camera should look as good as new. However, if the issue persists or you’re not comfortable handling it yourself, seeking professional help is advisable.