If you’ve struggled with taking pictures on your iPhone camera against the light, you’re not alone. Many people find this to be a challenging situation, but with a few adjustments, you can capture stunning images. This article provides a step-by-step guide to help you conquer this common yet solvable issue.
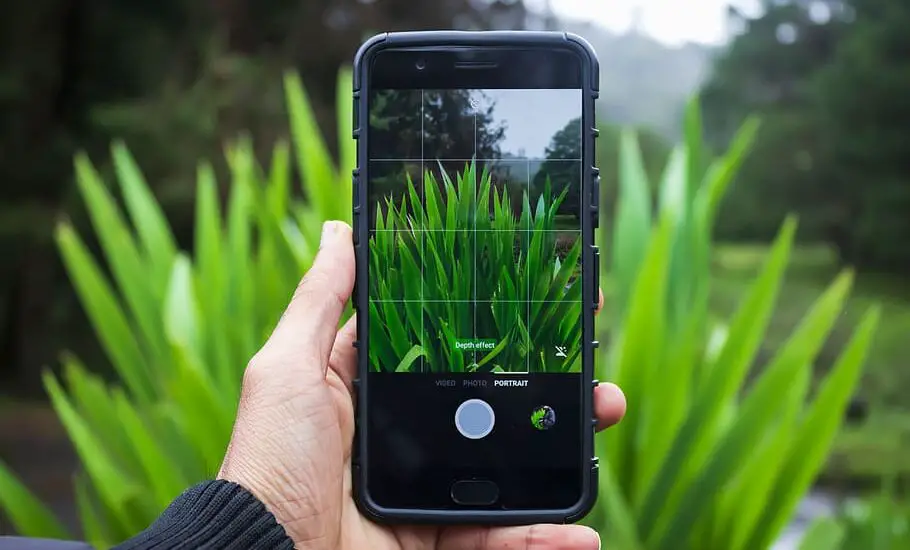
Table of Contents
Understanding the Challenge
When you take a photo with your iPhone camera against the light, you often encounter problems like overexposure, lens flare, or washed-out subjects. Understanding how light affects your pictures will guide you in troubleshooting these issues.
How to Take a Picture with Your iPhone Camera Against the Light
Follow the steps below to take a picture with your iPhone camera against the light…
Step 1: Enable HDR Mode
High Dynamic Range, commonly known as HDR, is a feature that automatically blends the best parts of three different exposures into a single photo. This is incredibly useful when you’re shooting against the light because it helps to balance the bright background and the darker foreground.
Opening the Camera App: Locate and tap on the Camera icon on your iPhone’s home screen to open it.
Locating the HDR Option: Once the Camera app is open, look for the “HDR” option, usually located at the top of the screen. If you don’t see it, you might need to swipe left or right to find this option.
Activating HDR: Tap the “HDR” icon to activate it. When HDR is enabled, you’ll typically see a small yellow box that says “HDR” appear somewhere on your screen. This indicates that the feature is now active.
By enabling HDR, you allow your iPhone camera to take multiple shots at different exposures and merge them into one optimized photo. This is particularly useful when dealing with challenging lighting scenarios such as shooting against the light.
Step 2: Utilize the AE/AF Lock Feature
Auto-Exposure/Auto-Focus lock, or AE/AF lock, is a helpful feature that allows you to lock the exposure and focus settings based on a specific subject. This is crucial when taking photos against the light because it prevents your camera from automatically adjusting its settings, which can result in a washed-out or blurry image.
Framing Your Shot: Open your Camera app and frame the shot you want to take. Place your subject within the viewfinder of your iPhone’s camera.
Engaging the Lock: Tap on your subject on the screen and hold your finger down. Continue to hold until a yellow square appears around the subject and the AE/AF lock banner shows up at the top of the screen.
Confirmation: Once the AE/AF lock is engaged, you’ll see a banner at the top of your screen that says “AE/AF Lock.” This confirms that both the exposure and focus are set based on your chosen subject.
Taking the Shot: With AE/AF lock activated, you can now reframe your shot, knowing that the focus and exposure will remain consistent. Tap the shutter button to take your photo.
Step 3: Adjust Exposure Manually
Even with the AE/AF lock feature in play, there might be situations where the lighting isn’t quite what you want. Perhaps the sky still looks too bright, or maybe your subject appears somewhat dim. This is where manual exposure adjustments come in handy.
Unlocking the Screen: If you have AE/AF lock enabled, you’ll need to tap on an empty area of your screen to disengage it before making manual adjustments.
Accessing Manual Exposure: Once you’ve disengaged AE/AF lock, tap on the area where you want to adjust exposure. You will see a small sun icon appear next to a yellow square.
Adjusting Exposure: Swipe up on the screen to increase exposure and make the image brighter. Swipe down to decrease exposure and make the image darker. Watch the changes in real-time as you slide your finger.
Confirming Changes: Once you’re satisfied with the level of exposure, stop swiping. The manual exposure adjustment will hold for that specific shot.
By manually adjusting exposure, you get that extra layer of control to ensure your photos turn out just as you envision them, especially when dealing with tricky lighting situations like shooting against the light.
Read more iPhone camera topics here – iPhone Camera: How To, Problems & Solutions
Step 4: Use Gridlines for Composition
Gridlines can be an invaluable tool when composing your shots, offering a guide to align your subject and background elements effectively.
Navigating to Settings: Close your Camera app and go to your iPhone’s main Settings app. Scroll down and select “Camera.”
Activating Gridlines: In the “Camera” settings menu, locate the “Grid” option and toggle it on.
Using the Grid: Once activated, you’ll see a grid overlay on your Camera app. These lines divide the screen into nine equal parts, based on the “Rule of Thirds.”
Composing the Shot: Use the gridlines to align your subject or other elements of interest at the intersections or along the lines of the grid.
Gridlines can be especially useful when taking photos against the light, as they help you better position your subject relative to the light source.
Step 5: Take Multiple Shots
Variety is the spice of life and photography is no different. Taking multiple shots offers you different perspectives and more options during the editing phase.
Setting Up for Multiple Shots: Frame your first shot as best as you can, making use of all the features and adjustments mentioned earlier.
Taking the Photos: Tap the shutter button to take your first photo. Without changing position, try altering your angle slightly or adjust the zoom level and take another shot.
Reviewing Your Shots: After taking multiple shots, go to your Photos app to review them. This will give you a variety of options to choose from, making sure you select the one that best captures your vision.
Conclusion: iPhone Camera Against the Light
Shooting with your iPhone camera against the light doesn’t have to be a point of frustration. With a bit of know-how and by making use of your iPhone’s built-in features, you can master the art of capturing beautiful photos, even in challenging lighting conditions.
